|
|
|
|
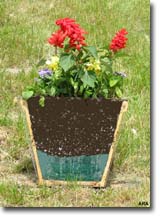
How to Create Easy Container Gardens with Better Drainage and Lighter PotsContainer gardens are perfect for small yards, balconies, outdoor decks and wherever you want to add color and interest. For first-timers or veterans, here are some tips for getting the best looking, lush flower pots in the neighborhood: Potting Start to FinishColor Scheme PlanningBegin by thinking about color schemes you'd like to enhance your patio or deck. How will the flowers on your deck accent your kitchen's décor? Think about what you planted last year, what worked and what didn't and what exciting new varieties are available. Start looking at books and magazines for ideas and how you'd like your own containers to look. Consider light conditions and what plants work well together -- shade foliage won't grow well in conditions appropriate for, say, a Geranium. Toy with interesting textures and leaf colors in addition to bloom colors. A variety of foliage adds unique depth to your garden. Herbs and vegetables are becoming a popular trend. A corn plant, for instance, by itself as the main focal point is rather stunning. Snow peas growing up a post create curiosity. Purple basil, arugula, oregano and nasturtium are lovely flowering edible plants. A Healthy FoundationFirst, remember that trying to grow anything in containers with dirt from outside is a recipe for disaster. For proper planting, use fresh, sterile potting soil that has the appropriate balance of ingredients for good nutrient absorption and water management. The types of annuals you plant also dictate what mix you use and whether you add more or less soil conditioner. If you decide to make your own potting mix, depending on what you're planting, possible mix components include compost, sphagnum peat moss, loam, sand, vermiculite, perlite, osmocote and soil moist to name a few. Whether you have a favorite soil brand or you make your own, any seasoned container gardener knows that replacing soil for all your outdoor pots requires large quantities. Large pots can take up to four bags of potting mix each. Depending on how many containers you will plant, consider having a 1/2 yard of potting soil delivered. Soil DrainageNo matter what you plant, if planters become too waterlogged, you won't get hearty blooms and the roots will die. Every pot needs a drain hole and some type of material in the bottom so the soil doesn't run out the bottom of the pot and so drainage holes don't clog. Some materials used to assist drainage are rocks, broken terra cotta pieces and packing peanuts. Many times these don't work, for in as little as three weeks, soil runs down into the crevices and blocks the drainage you so diligently tried to create. Also, once the pots are filled with rocks, soil, plants and water, they can get very heavy and hard to move.
Your pots will be lighter (no rocks!) and you'll use up to 1/3 less soil in each pot. And because Better Than Rocks keeps the soil in the pot where it belongs, you don't have to refill the pot with soil as the season progresses. It promotes better drainage for superior plant health and more blooms. For large containers, you can fill the very bottom with the crushed annual packs that your plants come in or another lightweight material, then use two layers of Better Than Rocks on top of that to keep the soil in the top part of your planter. The GreeneryOnce your drainage system is in place, fill the pot with soil so the middle third of the pot is full, leaving four to five inches for plants. Next, take the plant plugs out of the flats and set them in the pot. Start with the taller, wider center plant. Then place the next largest plugs around the perimeter, in balance according to color and size, with the smallest placed last. Rearrange until you are satisfied. If you are creating matching planters, arrange them similarly before adding soil, in case you want to exchange plants between pots. Once all the plants are placed to your liking, begin filling with soil. Fill the soil in between each plug, ensuring that all holes and spaces are filled. Don't pack the soil and plugs down too hard, as this constricts the roots and inhibits plant growth. Water well, making sure it seeps out the bottom. Watch as holes develop between plugs and fill in with dirt. Water again. As your containers bloom and grow, give your plants a "haircut." Pluck off dead blossoms and trim leggy growth to keep your containers blooming well into the fall. Fall CleanupWhen it's time to put everything away for winter, dump your pots out. This soil is ideal to top off your perennials or add to your compost. When using Better Than Rocks, you won't have to pick out the rocks or other material from the bottom of the pot. Pull out the plastic layers, cutting off roots that may have grown into it. Roots that have grown into it will dry out over the winter and easily come out the following spring. Saving MoneyRefurbishing container garden supplies every spring gets expensive. With Better Than Rocks, you use 1/3 less soil -- an easy way to cut expenses (or buy more plants!) The recycled non-woven plastic won't break down, so you can reuse Better Than Rocks for years. For a special discount on your Better Than Rocks purchase, log on to www.betterthanrocks.com and use code "btr2ara07" or call (888) 994-7855. With this special code, you will receive 20 percent off your total order! Ask for Better Than Rocks by name at your local garden center and let them know you want them to carry it. Retailers and landscapers are welcome to order by contacting Better Than Rocks directly. Courtesy of ARAcontent EDITOR'S NOTE: Better Than Rocks is a registered trademark of Archovations, Inc. For more tips on your garden, please read this article on choosing a pot and planter.
|
|
||||||||||
|
||||||||||||
|
|
||||||||||||

 One
alternative is Better Than Rocks -- a non-woven, 100 percent recycled and
reusable plastic mesh. This is a new planter drainage material that is placed in
the bottom of containers. The precut squares can be used in either square or
round containers. For a round plant container, fold the corners up or down and
alternate each layer. The material is very flexible so there is no need to trim
the squares into circles. Better Than Rocks is also available in a large roll of
material that you can cut to your desired size to fit planters precisely or
accommodate your odd shaped planters.
One
alternative is Better Than Rocks -- a non-woven, 100 percent recycled and
reusable plastic mesh. This is a new planter drainage material that is placed in
the bottom of containers. The precut squares can be used in either square or
round containers. For a round plant container, fold the corners up or down and
alternate each layer. The material is very flexible so there is no need to trim
the squares into circles. Better Than Rocks is also available in a large roll of
material that you can cut to your desired size to fit planters precisely or
accommodate your odd shaped planters. 